
Unlocking Seed Germination Success:
Reading Time: 10 - 13 minutes (2823 words)
Table of Contents
Seed Dormancy: Nature's Pause Button

In the world of gardening and plant propagation, the concept of seed dormancy plays a crucial role in the lifecycle of many plants. Seed dormancy is a survival mechanism that prevents seeds from germinating until conditions are optimal for the survival of the seedling. This natural pause in the seed's lifecycle ensures that germination only occurs when environmental conditions such as temperature, moisture, and light are favourable for growth. Without this mechanism, seeds might germinate in unsuitable conditions, leading to the premature death of the seedling due to cold, drought, or insufficient light.
The Challenge of Dormancy for Gardeners
However, while seed dormancy is beneficial in the wild, it can pose challenges for gardeners and farmers who wish to cultivate plants from seeds. In many cases, seeds with dormancy will not germinate simply by being planted in soil and watered. They require specific treatments to overcome their dormancy and trigger the germination process. This is where stratification and scarification come into play.
Mimicking Winter to Wake Seeds
Stratification is a process used to simulate the natural cold period that many seeds would experience over winter, breaking their dormancy and allowing them to germinate in the spring. This treatment involves exposing seeds to a period of moist, cold conditions, typically by placing them in a refrigerator for a specified amount of time.
Breaking Barriers for Germination
Scarification involves physically or chemically breaking, scratching, or softening the seed coat to allow water and gases to penetrate, effectively signalling the seed that it is time to germinate. This can be done through methods such as rubbing the seed with sandpaper or soaking it in water.
Exiting Dormancy
The necessity of overcoming seed dormancy through stratification or scarification is paramount for successful germination of certain plant species. By understanding and applying these techniques, unlikely gardeners can effectively coax dormant seeds into sprouting, paving the way for a vibrant and thriving garden. This initiation into the basics of seed dormancy, stratification, and scarification sets the stage for a deeper dive into the specifics of each process, empowering gardeners to unlock the full potential of their seeds.
Understranding Seed Dormancy
Seed dormancy is a natural state of suspended growth and development in seeds, preventing germination even under favourable environmental conditions. This adaptive feature ensures that seeds remain inactive until conditions are optimal for the survival of the emerging seedlings. The biological significance of seed dormancy lies in its ability to synchronize germination with favourable environmental conditions, thus maximizing the chances of seedling survival. It allows seeds to endure through periods of adverse weather conditions, such as extreme cold or drought, and germinate when the probability of seedling growth and survival is highest.
Seed dormancy is broadly classified into two main types: physical (mechanical) dormancy and physiological dormancy, which can include chemical factors.
- Physical (Mechanical) Dormancy: This form of dormancy arises from the seed coat being too hard and impermeable to allow water and gases to pass through. The seed coat effectively acts as a physical barrier, preventing the embryo within from initiating the germination process. Mechanical dormancy is common in seeds of many plant families and requires scarification to break. Scarification methods physically breach the seed coat, making it permeable to water and oxygen, cues that trigger the end of dormancy and start of germination.
- Physiological Dormancy: This type involves more complex internal factors that prevent germination, even if the seed coat is removed or permeable. It can include:
- Innate dormancy, where seeds are dormant immediately upon shedding from the parent plant.
- Enforced dormancy, where external conditions (usually environmental) prevent germination.
- Induced dormancy, which occurs when a seed that was previously non-dormant becomes dormant due to unfavorable environmental conditions.
Physiological dormancy may involve chemical inhibitors present within the seed that prevent germination, or it may be due to the absence of certain hormones or environmental cues needed to trigger germination. Overcoming physiological dormancy often requires stratification, which mimics the natural cold and moist conditions many seeds would experience over winter, or other treatments that alter the seed's internal chemical environment.
Understanding the type of dormancy a seed has is crucial for determining the appropriate pre-germination treatment. Physical dormancy requires mechanical alteration of the seed coat, while physiological dormancy may require temperature treatments (cold stratification), exposure to light, or chemical treatments to initiate germination. This knowledge allows gardeners to effectively manage seed germination and ensure the successful establishment of plants.
The Stratification Process
Stratification as you now know is a pre-germination process used to simulate the natural winter conditions that some seeds must experience before they can break dormancy and germinate. As detailed, the purpose of stratification is to mimic the cold and moist environment many seeds would naturally endure during winter, effectively tricking them into "thinking" they have passed through the cold season and that it is now safe to germinate with the arrival of warmer spring temperatures. This process is essential for seeds that possess physiological dormancy, as it helps to break down chemical inhibitors and induces the necessary physiological changes for germination to occur.
Steps for Cold Stratification:
- Selection of Seeds Requiring Stratification:
- Identify and select seeds that require cold stratification. This information can usually be found on seed packets, in gardening books, or through reliable online gardening resources.
- Preparing Seeds for Stratification:
- Clean the seeds, if required, to remove any debris or flesh, as this can encourage fungal growth during stratification.
- Moisten the seeds slightly. This can be done by soaking them in water for a few hours or overnight, depending on the seed's requirements. The goal is to ensure they are moist but not waterlogged.
- The Stratification Medium:
- Choose a medium for stratification, such as sand, peat moss, or paper towels. The medium should be moist but not soaking wet.
- Place the seeds in a mix with the chosen medium in a plastic bag or airtight container. If using paper towels, seeds can be placed between two moistened towels and then placed in a bag.
- Duration and Temperature Requirements:
- The duration of cold stratification varies by species, ranging from a few weeks to several months. Typically, a period of 1-4 months is common.
- Maintain the seeds at a consistent cold temperature, usually between 33°F to 41°F (.5°C to 5°C). The refrigerator is the most convenient and controlled environment for stratification.
- Monitoring for Germination and Moisture Levels:
- Check the seeds periodically for signs of germination and to ensure the medium remains moist. If any seeds start to germinate, they can be removed and planted.
- Avoid letting the medium dry out completely, as this can halt the stratification process and potentially harm the seeds.
- List of Common Plants That Require Stratification:
- Many perennial, shrub, and tree seeds require cold stratification. Common examples include:
- Milkweed (Asclepias spp.)
- Coneflower (Echinacea spp.)
- Lavender (Lavandula spp.)
- Rudbeckia (Rudbeckia spp.)
- Primrose (Primula spp.)
- Maples (Acer spp.)
- Apple (Malus spp.)
- Many perennial, shrub, and tree seeds require cold stratification. Common examples include:
Understanding and implementing the stratification process can significantly improve the germination rate of seeds with physiological dormancy. By simulating the natural conditions these seeds would experience in the wild, you can cultivate a wider variety of plants, enhancing the beauty in your garden.
The Scarification Process
Scarification is also a pre-germination treatment that involves physically or chemically breaking, scratching, or softening the seed coat to overcome physical dormancy. The purpose of scarification is to make the impermeable seed coat permeable to water and gases, which are essential for initiating the metabolic processes necessary for germination. By weakening the seed coat, scarification mimics the natural processes that would wear down the seed coat in the wild, such as passage through an animal's digestive tract, weathering, or microbial action, thereby allowing the seed to germinate more readily.
Detailed Steps for Scarification:
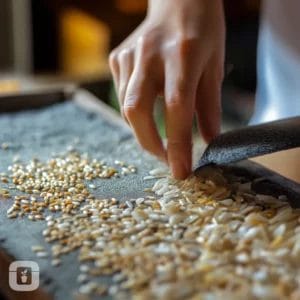
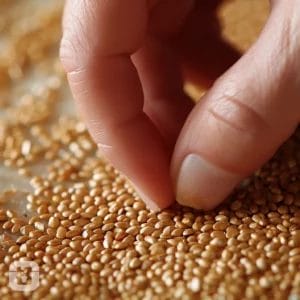
Mechanical Scarification Methods:
- Filing or Sanding the Seed Coat: Gently rub the seed on fine-grit sandpaper or use a file to wear down one area of the seed coat. The goal is to breach the coat without damaging the embryo inside. This method is effective for seeds with particularly hard coats.
- Nicking: Using a knife or small scissors, carefully make a small nick in the seed coat, being careful not to cut too deeply into the seed itself.
Other Scarification Methods:
- Soaking in Warm Water: Soak the seeds in warm water for several hours to a couple of days, depending on the species. The warm water softens the seed coat, making it more permeable. Change the water periodically to prevent the growth of fungi or bacteria.
- Using Chemical Agents: For some seeds, especially those with very tough coats, chemical scarification with a mild acid, like sulfuric acid, can be used. This method should be undertaken with extreme caution and is generally more appropriate for large-scale propagation efforts.
Handling and Care Post-Scarification:
- Immediate Planting: Once scarified, seeds should generally be planted soon after to take advantage of the increased permeability and to reduce the risk of the seed drying out or being damaged.
- Moisture Management: Ensure that the planting medium is moist but not waterlogged, to provide the right conditions for germination.
- Protection: Keep the planted seeds in a warm, protected environment, free from pests and extreme conditions that could hinder germination.
List of Common Plants That Benefit from Scarification:
- Many seeds with hard, water-impermeable coats require scarification. Some common examples include:
- Morning Glories (Ipomoea spp.)
- Beans (Phaseolus spp.)
- Lupines (Lupinus spp.)
- Sweet Peas (Lathyrus odoratus)
- Moonflowers (Ipomoea alba)
- Nasturtiums (Tropaeolum majus)
- Lotus (Nelumbo spp.)
- Certain types of acacia (Acacia spp.)
Scarification, whether mechanical or chemical, is an essential step in the germination process for many other types of seeds. It increases the germination rate and speeds up germination time, making it a great way for unlikely gardeners to grow plants from seeds that have evolved to survive harsh conditions.
Practical Gardening Tips
If you're looking to maximize your success in starting plants from seeds, understanding whether certain seeds require stratification or scarification is essential. Here are some practical tips to help identify these needs, properly time and plan for pre-treatment, and ensure effective aftercare for the best germination.
Identifying Seeds that Require Stratification or Scarification
- Reading Seed Packets: Seed packets often provide crucial information on whether a seed requires stratification or scarification. Look for notes such as “requires pre-chilling” or “needs scarification before sowing” as clear indicators of the necessary pre-treatment.
- Researching: For seeds collected in the wild or received from others without packaging, online gardening databases, botanical references, and gardening books can be invaluable resources. Many local gardening groups, university extension services and botanical gardens often provide detailed germination guides for various species and locations.
Timing and Planning for Pre-treatment
- Know Your Growing Zone: Understanding your USDA Hardiness Zone (recently updated) or your local equivalent can guide you on when to start seeds indoors. Many seed catalogues also include similar information. This is crucial for timing stratification periods so that seeds are ready to plant at the optimal time in your region.
- Stratification Timing: For seeds requiring cold stratification, count backward from your region’s last frost date to determine when to start. If a seed needs 3 months of cold treatment, plan to start stratification in the winter so it aligns with spring planting times.
- Scarification and Immediate Planting: Since scarified seeds are ready for water uptake and germination soon after treatment, plan to scarify just before you intend to sow them. This is particularly important for seeds that germinate quickly after scarification.
Aftercare: Post-Stratification and Scarification
- Post-Stratification Planting: Once seeds have completed their stratification period, plant them as soon as possible. Use a well-draining soil mix and plant at the depth recommended for each species. Keep the soil moist but not waterlogged to encourage germination.
- Care for Scarified Seeds: After scarification, seeds should be planted immediately into a moist, well-draining growing medium. Because the seed coat has been compromised, these seeds may be more sensitive to drying out or fungal attacks, so maintain a consistent moisture level and watch for signs of germination.
- Temperature and Light: Provide appropriate warmth and light conditions based on the needs of the plant species. Some seeds require light to germinate and should be sown on the soil surface or covered lightly with soil. Others may need darkness and can be covered more deeply.
- Monitoring and Patience: Keep an eye on soil moisture, temperature, and signs of fungal growth. Germination times vary widely among plant species, so patience is key. Some seeds may germinate within a week or two, while others may take several months.
Troubleshooting & FAQ
roubleshooting and FAQs for Stratification and Scarification
Q1: My seeds still haven't germinated after stratification. What could have gone wrong?
- A: Several factors could be at play:
- Insufficient Stratification Time: Some seeds may require a longer cold period to break dormancy.
- Incorrect Temperature: If the refrigeration temperature was too high or too low, it may not have adequately mimicked natural winter conditions.
- Dryness: The seeds must stay moist throughout stratification. If they dried out, they might not germinate.
- Timing: Seeds planted too early or too late after stratification might miss their optimal germination window.
Q2: How can I tell if I've damaged seeds during scarification?
- A: If seeds are crushed, cut too deeply, or excessively filed, they may be damaged. Gentle handling is key. If seeds do not germinate and show signs of mold or decay, they may have been compromised during scarification.
Q3: What should I do if seeds mold during stratification?
- A: Mold growth indicates too much moisture. If mold is detected early, you can try to salvage the process by:
- Removing affected seeds and the moldy medium.
- Gently cleaning the remaining seeds with a mild bleach solution (10% bleach, 90% water) and rinsing thoroughly.
- Repackaging seeds in a fresh, slightly less moist medium and continuing the stratification process.
Tips for Success with Stratification and Scarification
- Keep Records: Note the start date, treatment method, and species. This helps you track progress and make adjustments for future attempts.
- Start with Fresh Seeds: Viability decreases over time, so fresher seeds often have better germination rates.
- Moderate Moisture: Whether stratifying or after scarification, ensure the medium is moist but not wet to prevent mold and rot.
- Patience is Key: Some seeds take longer to germinate than others. Don't give up too soon; some seeds may take several weeks to several months to sprout.
What to Do if Seeds Do Not Germinate
- Reevaluate Conditions: Ensure that post-treatment conditions (soil moisture, temperature, light) are suitable for the specific plant species.
- Second Attempt at Treatment: For stratification, consider a second, perhaps longer, cold treatment period. For scarification, ensure the seed coat was adequately weakened without harming the embryo.
- Consult Expert Sources: Reach out to local gardening clubs, extension services, or online forums for advice specific to the plant species and local growing conditions.
- Experiment with a Few Seeds: If you have multiple seeds, try different methods of stratification or scarification on a small scale to find what works best.
- Consider Other Factors: Seed viability, soil conditions, and environmental factors can all influence germination. Ensure all conditions are optimized for the specific needs of your seeds.
The Recap
Understanding and implementing stratification and scarification are essential techniques in the Unlikely Gardener's toolkit for overcoming seed dormancy. Stratification mimics the cold, moist conditions of winter, breaking the physiological dormancy of seeds that require these conditions to germinate successfully. Scarification, on the other hand, physically or chemically weakens the seed coat, overcoming physical dormancy by allowing water and gases to reach the embryo within. Both processes are vital for stimulating the germination of many types of seeds, especially those of perennials, trees, and shrubs that would otherwise remain inert in the soil.
I encourage gardeners of all skill levels to experiment with stratification and scarification. While not all seeds require these treatments, for those that do, the effort can significantly improve your success rates. Start with a small batch of seeds to test the process and adjust your techniques based on the results.
Gardening for me is often as much about learning and experimentation as it is about the joy of watching things grow. Embrace these techniques as opportunities to explore the fascinating world of plant propagation and to enhance the diversity and vitality of your garden.
Good Luck Out There!
Life is busy. Give Us Your Name & Email and We'll Send You Content.
